
Selfiefinder adds a photo montage experience to an organization’s events by providing attendees with the ability to upload their photos of the event to a common gallery. An attendee’s uploaded event selfies are combined with the selfies of other attendees to form a compelling and unique montage of your event that attendees and their families and friends alike will enjoy.
As the manager of your event in Selfiefinder, you are responsible for creating the event which consists of specifying the event information, setting the upload date window for selfies and the montage display date window, the email messages and on-screen messages presented to uploaders and viewers, and controlling how selfies are approved. Depending on whether you choose to allow automatic approval or require approval of uploaded selfies, you may also be actively monitoring uploads during the time that the upload window is active.
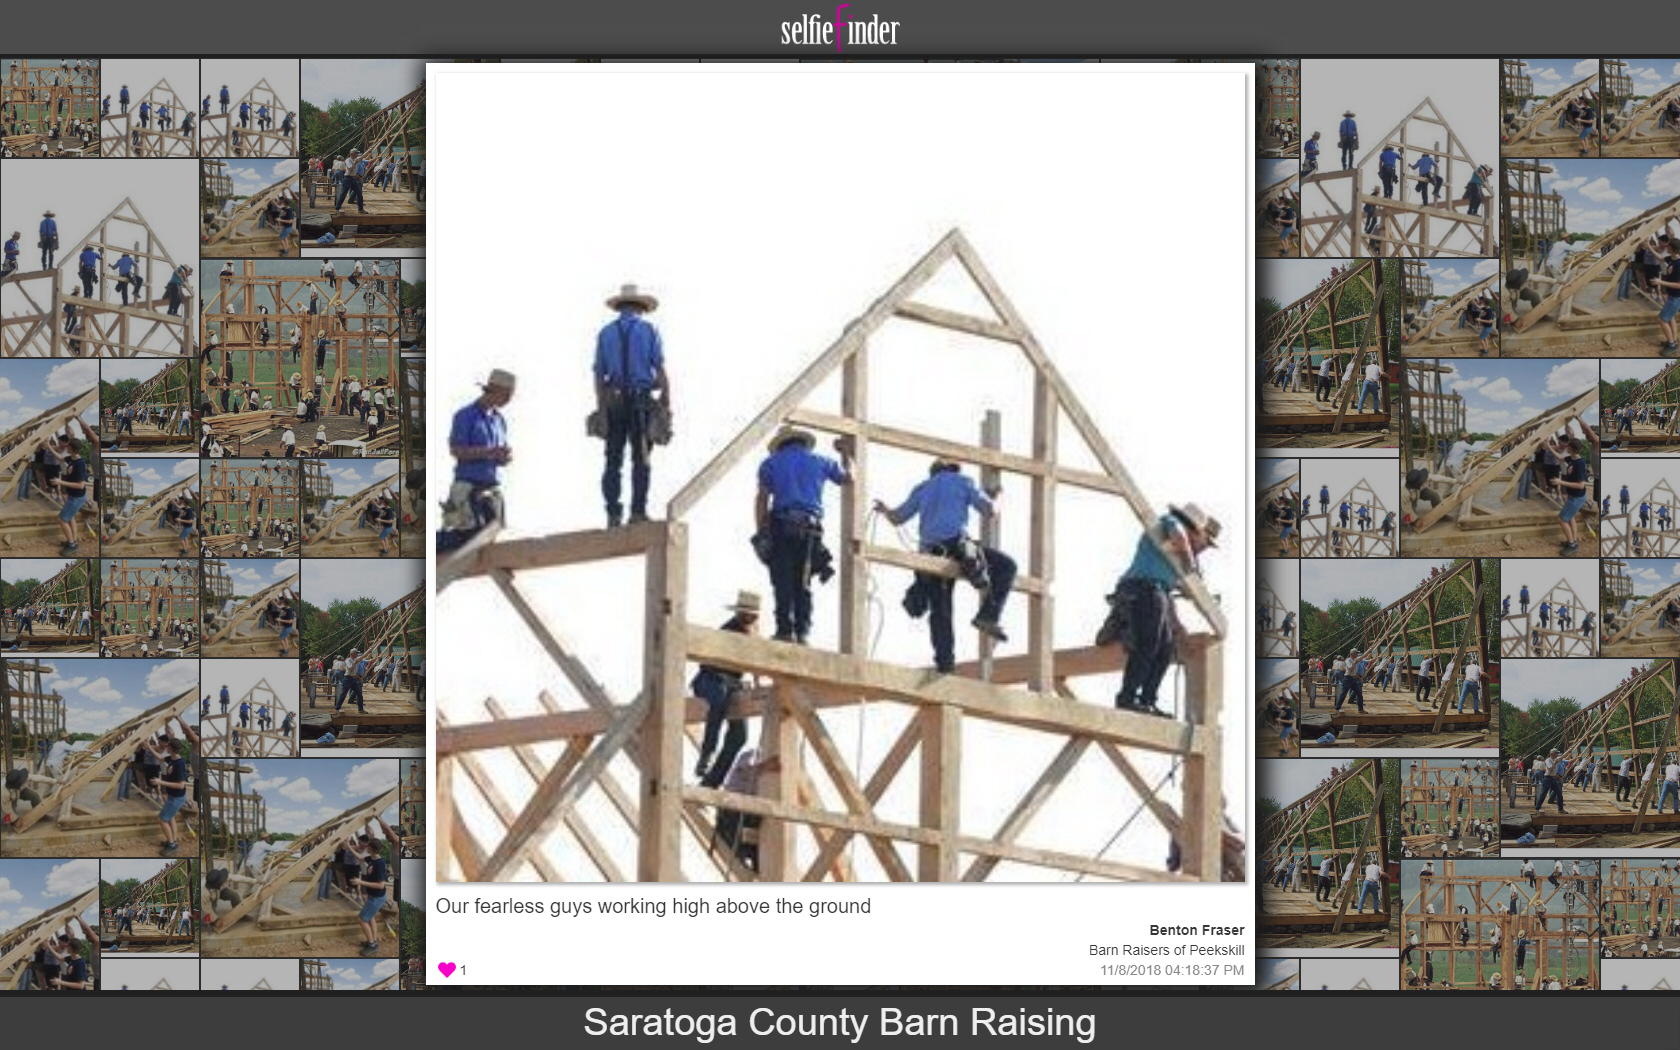
Figure 1: Selfiefinder Montage with Attendee-Supplied Image Displayed
Preparation
While Selfiefinder is intuitive and easy to use, we have found that a little preparation goes a long way toward quickly and efficiently creating your event. The main elements for preparation are having the physical items ready such as the event information, contact information, and the event photos you will supply to serve as the base for the montage until attendees upload their own photos, and the event date windows for uploading and viewing.
Organizer-Supplied Event Photos
Organizer-supplied event photos fall into two categories:
- General—Photos supplied by your organization showing the venue, past events, and other related images.
- Attendee—Photos supplied by attendees in advance of the event such as team photos and vendor offerings.
An event will always have general organizer-supplied event photos, but may not have attendee organizer-supplied photos depending on the event.
Event Date Windows
In terms of the event date windows, we built Selfiefinder as a way for your attendees to further engage in the event by uploading their selfies so we recommend the following for event date windows:
- Upload—A one week window beginning with the opening of the event and extending to a week after. Most people will upload during and a few days after the event making a full week window long enough to cover even the most ardent procrastinators.
- Viewing—A minimum of two weeks beginning with the opening of the event but possibly going out to a year after the event if your organization expects to repeat the event and wants to maintain interest and momentum throughout the year.
For example, the recommended event date windows for an event that runs on the weekend of November 10 and 11 would be an upload window of November 10–November 17, and a minimum viewing window of November 10–November 24. Of course, you can select any date windows you wish including windows that begin prior to the event. Selfiefinder itself does not impose any restrictions.
Email Messages
The email messages sent from Selfiefinder can be simple one liners or they can be the same format as other email from your organization using the built-in rich text editor. We recommend that you have a copy of your standard email handy to paste into the email templates. Selfiefinder supports linked icons for social networks and other features of a typical email client so that you can preserve your organization’s branding within Selfiefinder. As well, you can insert the fields you have defined for your event such as the start date and location into an email using variables to further customize the messages for an event.
Create A New Selfiefinder Event
Users create new events in Selfiefinder from the Events tab of Manage using the Add Event function. The Events tab contains the Events grid that lists previously created events and provides functions for editing, downloading, and deleting them.
Add Event
The Add Event function has seven sections consisting of fields and configuration parameters.
| Section | Purpose |
| General Information | Event overview |
| Settings | Controls for images and privacyw |
| Contact | Point of contact |
| Montage | Organizer-supplied images configuration |
| Upload Settings | Attendee-supplied images configuration |
| Gallery | Gallery availability and message |
| Email Messages | Email messages to attendees |
General Information
General Information consists of the name, location and dates and times of the event, and the event image. It is essentially the information that you put on flyers and other promotional material.
Settings
Settings control how Selfiefinder handles attendee-supplied photos and whether the event is public or private. Again, we suggest using with care the automatic approval setting. The tradeoff is that not automatically approving submissions requires someone to actively manage the submissions while automatically approving submissions may allow something you don’t want to be displayed.
Contact
Contact information is similar to General Information in that is the point of contact information that you typically put on promotional material.
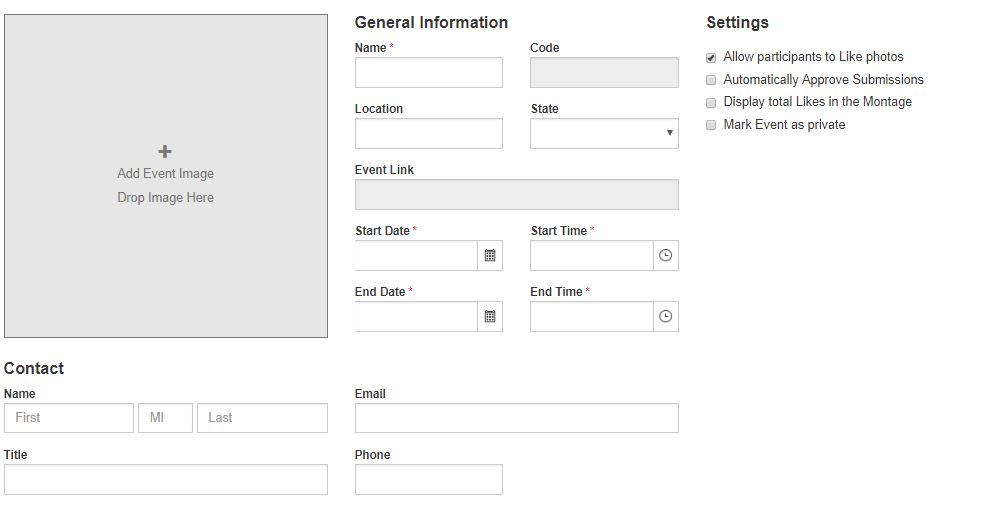
Figure 2: General Information, Settings and Contact Sections
Montage
Montage manages the organizer-supplied images, their interaction with the attendee-supplied images, and the display interval of the attendee-supplied images. Organizers may upload a variety of images to fill the montage while awaiting attendee-supplied images. The percentage to display is the ratio of the different types of images to each other and defaults to favoring the attendee-supplied images over the organizer-supplied images, but can be set to any ratio needed. The photo rotation for displaying attendee-supplied images specifies up to ten seconds of display before switching to the next image.
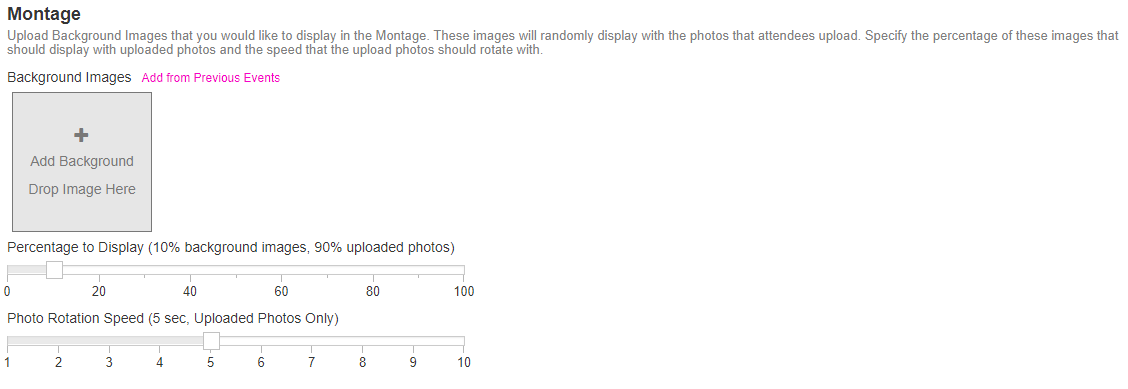
Figure 3: Montage Section
Upload Settings
Upload Settings control the settings associated with the uploaded attendee-supplied images. You can set the fields available to attendees when they upload images and which ones are required. This gives attendees a bit of narrative to go along with their images in the gallery. You can also set one or more of the Montage fields—Caption, Name, Organization, and Upload Time—to show on images.
The Upload event date window is also specified in Upload Settings. You can select a specific start and end date range or not specify anything but instead use the Entire Event option to limit the window to the event date and time range set in General Information. Whichever event date window you select, you can accept the default Not Yet Available and Closed on-screen messages or edit them with your own wording. You may also use one or more event variables to add event-specific information.
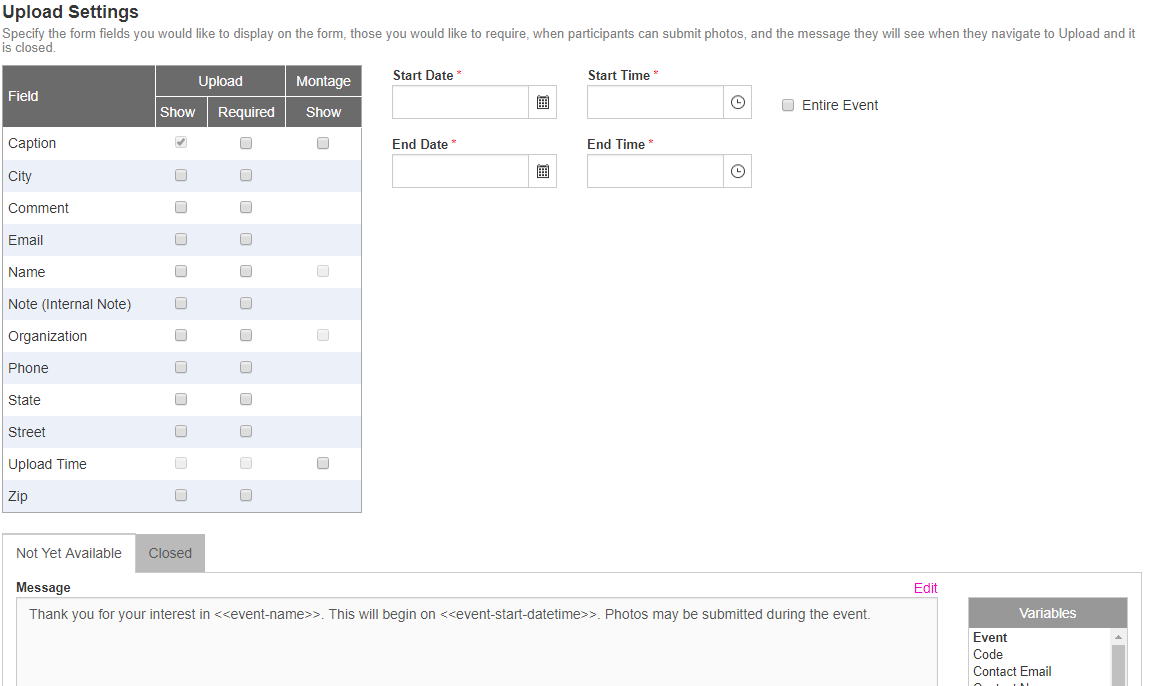
Figure 4: Upload Settings Section
Gallery
Gallery sets the Gallery event date window and the Gallery Closed on-screen message. It is very similar to the Upload event date window settings except that there is no Entire Event option.
Email Messages
Email Messages provides the three email messages—Uploaded, Approved, and Rejected—that may be sent for attendee-supplied images. You can choose to send any or none of them. As well, you can accept the default subject and body for each, or edit them to your specifications using the event variables and also your own rich text formatting by pasting an email from your email client. Selfiefinder supports copied images and hyperlinks to make it convenient for you to preserve your organization’s email branding.
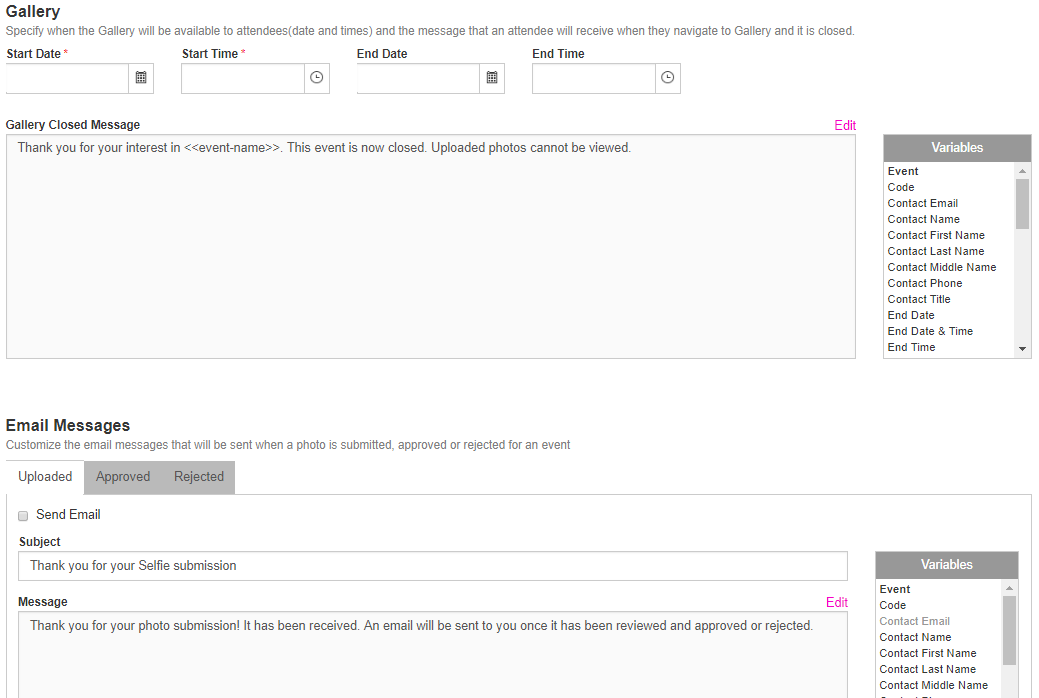
Figure 5: Gallery and Email Messages Sections
Full Instructions and Quick Steps
The full set of instructions for Add Event along with the quick steps. The instructions assume you have already clicked Add Event.
Full Instructions
- Enter the Name of the event.
- Enter the Location and select the State.
- Enter or select the Start Date and Start Time. Note that entering rather than selecting the time defaults to AM and must be changed to PM, if applicable.
- Enter or select the End Date and End Time.
- Upload the event image by clicking the plus sign in the image holder or dropping an image from your system.
-
Select the event settings:
- Allow attendees to like photos
- Have the system Automatically Approve Submissions
- Display total Likes
- Mark the Event private
- Enter the Name, Title, Email, and Phone of the event point of contact.
- Upload or drop organizer-supplied general and attendee images.
- Optionally add images from your Previous Events.
- Specify the Percentage to Display ratio of organizer-supplied to attendee-supplied images.
- Set the Photo Rotation Speed interval for showing attendee-supplied images before switching to the next image.
- Select the fields to Show when doing an Upload and set which of the fields are Required.
- Select one or more of the four Montage fields—Caption, Name, Organization, and Upload Time—to Show in the montage.
- Set the upload event date window Start Date and Time, and End Date and Time, or select the Entire Event option.
- Enter the Not Yet Available and Closed on-screen messages.
- Set the gallery viewing event date window Start Date and Time, and End Date and Time.
- Enter the Gallery Closed on-screen message.
- Enter the Uploaded, Approved, and Rejected email subjects and messages.
- Optionally send test messages to verify their look.
- Click Save to complete the event creation and add it to your event list.
Quick Steps
- Enter the event name, location and dates and times, and upload the event image.
- Select the event settings.
- Enter the point of contact details.
- Upload organizer-supplied images and configure the montage.
- Specify the attendee upload image information, upload window, and on-screen message.
- Specify the Gallery viewing window and on-screen message.
- Specify the uploaded, approved, and rejected email messages.